Brake pads are essential components of a vehicle’s braking system, responsible for converting friction into heat, slowing down, or stopping the vehicle. However, worn or loose brake pads can cause annoying rattling noises, compromising driving comfort and potentially indicating underlying issues. Anti-rattle clips, also known as brake pad shims or insulators, play a crucial role in eliminating these noises and improving braking performance. In this comprehensive guide, we delve into the world of anti-rattle clips, exploring their benefits, functions, and step-by-step instructions for installation. Whether you’re a seasoned mechanic or a DIY enthusiast seeking to address brake pad rattle, this guide will empower you with the knowledge and techniques to restore quiet and efficient braking to your vehicle.
A Comprehensive Guide to Anti Rattle Clips: Quieting Noisy Brake Pads
Are you tired of the incessant squealing and grinding noises emanating from your brake pads? It’s time to silence the symphony of unwanted sounds with our comprehensive guide to anti-rattle clips. These unassuming yet effective devices are the secret to achieving brake pad harmony, putting an end to the cacophony that disturbs your driving experience. Join us as we delve into the world of anti-rattle clips, exploring their purpose, installation process, and the myriad benefits they bring to your vehicle’s braking system. With our expert guidance, you’ll soon be able to restore the serenity to your drives and say goodbye to noisy brake pads for good.
.
What are Anti Rattle Clips and Why You Need Them
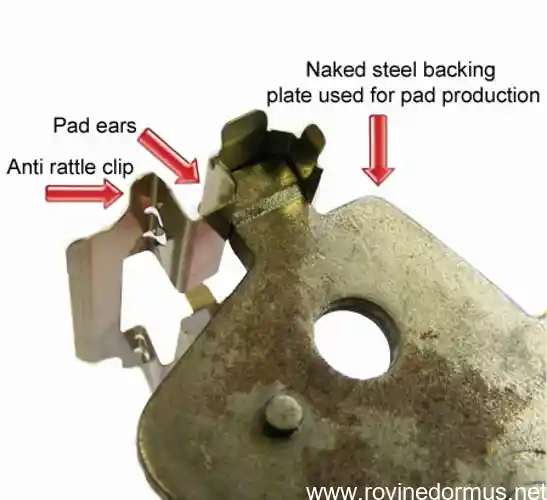
Anti-rattle clips, small metal clips that fit over your brake pads, play a crucial role in silencing the annoying squealing or rattling noises that can plague your vehicle. These pesky sounds arise from the vibration of the brake pads within the brake caliper, causing them to rub against the metal surfaces and producing that irritating noise. By installing anti-rattle clips between the brake pad and the caliper, you effectively quell these vibrations, ensuring a quieter and smoother braking experience.
How to Install Anti Rattle Clips: A Step-by-Step Guide
Ready to embark on a journey to silence those pesky brake pad rattles? Let’s dive right into the nitty-gritty of installing anti-rattle clips. Picture this: brake pads, the unsung heroes of your car’s braking system, start squeaking like a rusty swing set every time you apply the brakes. It’s enough to drive anyone crazy! Well, fear not, my friend, because anti-rattle clips are your knight in shining armor. They’re the secret weapon for putting an end to those dreaded noises.
In this ultimate guide, we’ll walk you through the process step-by-step, arming you with the knowledge to conquer those rattling demons once and for all.
Necessary Tools and Materials
Installing anti-rattle clips on brake pads is a straightforward procedure that can be completed in a few simple steps. To get started, gather the necessary tools, including a socket wrench, pliers, and a screwdriver. Next, prepare the brake pads by cleaning the surfaces where the clips will be installed. Remove any dirt or debris to ensure a secure fit.
Position the anti-rattle clips on the brake pads, making sure they are aligned correctly. Use pliers to gently bend the clips into place, securing them to the brake pads. Finally, reassemble the brake components and tighten the bolts to the specified torque. After installation, test the brakes to ensure they are functioning properly and that the rattling noise has been eliminated.
.
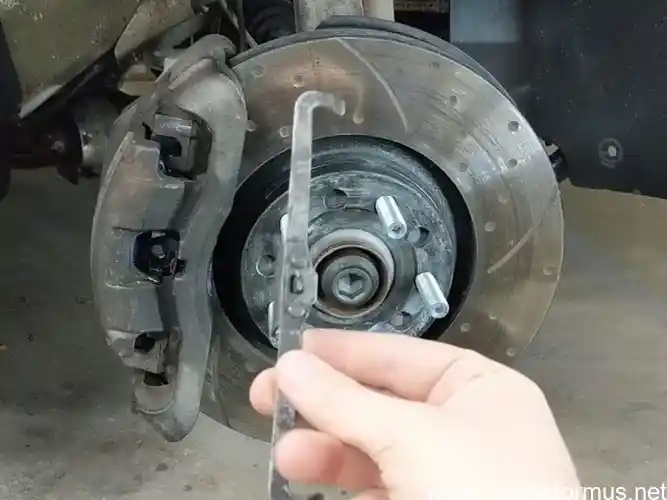
Preparatory Steps
Installing anti-rattle clips is a straightforward process that can be completed in a few simple steps. To begin, gather the necessary tools and materials, including a set of anti-rattle clips, a brake cleaner, a wire brush, and a torque wrench. Next, prepare the brake pads by cleaning them thoroughly with brake cleaner and wire brushing any rust or debris from the surface. Once the brake pads are clean, apply a small amount of anti-seize compound to the back of the pads to prevent them from seizing in place.
Now, position the anti-rattle clips over the brake pads and secure them in place using the torque wrench. Ensure that the clips are tightened to the manufacturer’s specifications to prevent them from becoming loose or rattling. After installing the clips, test the brakes to ensure they are functioning properly and that there are no unusual noises or vibrations.
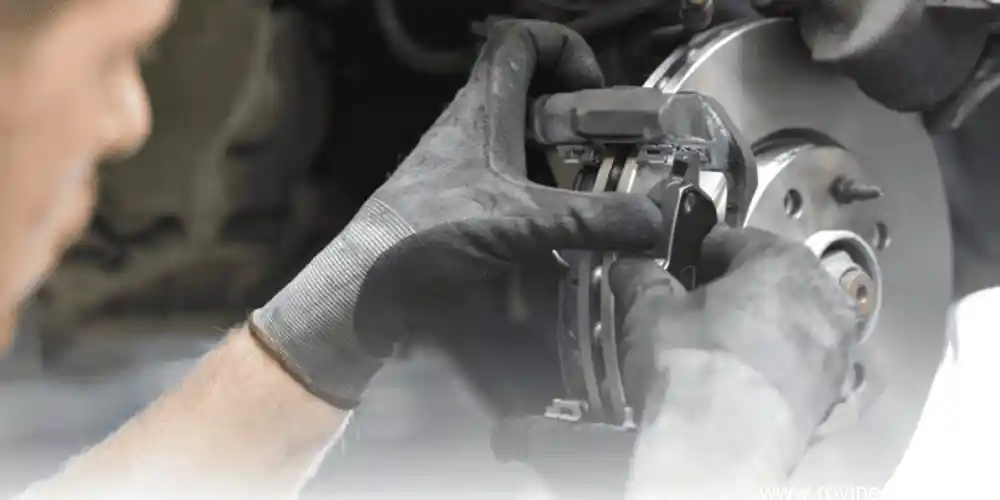
Installing the Clips
Embarking on the installation of anti-rattle clips on your brake pads is a straightforward endeavor that can effectively silence the irritating squealing and rattling noises emanating from your vehicle’s braking system. By following a step-by-step approach, you can restore tranquility to your driving experience and ensure that your brakes perform optimally. Remember, with the right tools and a little bit of know-how, you can effortlessly achieve this DIY task, saving you both time and money.
Post-Installation Considerations
If you’re tired of the annoying squealing and rattling sounds coming from your brakes, it’s time to consider installing anti-rattle clips. These simple yet effective devices are designed to eliminate the noise caused by the pads vibrating against the calipers. Installing them is a relatively straightforward process that can be completed in just a few steps.
Troubleshooting Common Issues with Anti Rattle Clips
Common problems with anti rattle clips can be frustrating, but don’t worry, you’re not alone. If you’re experiencing rattling or squealing noises despite having installed the clips, it’s important to troubleshoot the issue. First, check if the clips are securely fastened; loose clips can easily slip out of place. Next, examine the brake pads themselves; worn or uneven pads can cause vibrations that the clips can’t fully suppress.
Additionally, inspect the brake caliper and mounting bracket for any signs of damage or misalignment; these can introduce additional noise and interfere with the clips’ effectiveness. Lastly, ensure that the brake rotors are not warped or damaged; warped rotors can create vibrations that will be amplified by the clips. If you’ve checked all these aspects and still encounter issues, don’t hesitate to consult a professional mechanic for further assistance.
Benefits and Limitations of Using Anti Rattle Clips
Anti-rattle clips play a crucial role in the quiet operation of your brakes. By effectively reducing or eliminating the annoying squealing and rattling noises, these clips enhance your driving experience and maintain the integrity of your brake system. They act as stabilizers, preventing brake pads from vibrating against the calipers, which is the primary cause of those irritating noises. Moreover, anti-rattle clips help distribute the pressure evenly across the pads, ensuring optimal braking performance and extending the lifespan of both the pads and rotors.
By investing in these inexpensive yet highly effective devices, you can enjoy a smoother, quieter, and safer driving experience.
Q1. How do you install anti rattle clips on brake pads?
Ans: Install the clips on the brake pads before installing the pads on the caliper.
Q2. What are the benefits of using anti rattle clips on brake pads?
Ans: Anti rattle clips help to reduce noise and vibration from the brake pads.
Q3. How often should you replace anti rattle clips on brake pads?
Ans: Replace the clips every time you replace the brake pads.
Q4. Can I install anti rattle clips on my own?
Ans: Yes, you can install anti rattle clips on your own with basic tools.
Q5. What type of anti rattle clips should I use?
Ans: Use the type of anti rattle clips that are designed for your specific vehicle.
Q6. Where can I purchase anti rattle clips?
Ans: You can purchase anti rattle clips from auto parts stores or online retailers.

I am Senior Specialist, Marketing Implementation and Article content writer.


Leave a Reply